
This DIY truss beam farmhouse model outside desk and benches are good for eating and entertaining on a deck or patio!

Mates! Thanks all a lot in your form phrases about our deck reveal! It was so enjoyable to have individuals to share the joy with, and I’m thrilled to be again right now with extra particulars about one of many issues we’ve gotten probably the most questions on: our DIY farmhouse model outside desk!
As I used to be looking far and huge for the right desk to make use of in our house, I got here throughout this magnificence from Restoration {Hardware}.
I completely cherished the model. I didn’t completely love the worth. And even when I used to be prepared to spend 100 bajillion {dollars} on a desk, theirs was not made for use open air anyway, so I used to be out of luck.
I used to be moping round someday, all depressed in regards to the desk that was not meant to be and Donnie, aka my knight and shining armor ? , took one have a look at it and stated, “I can construct that.”
And he instantly earned himself 800 bajillion husband factors. (That are fictitious, in fact, but it surely places him on my good facet for some time, which is unquestionably value one thing… )
So I’ll let him take it from right here and let you know all in regards to the superb desk he constructed along with his personal two fingers (and likewise energy instruments) as a result of he’s fairly superior. Right here he’s!
The best way to Construct a DIY Farmhouse Out of doors Desk Step-By-Step
This submit comprises affiliate hyperlinks. For extra info, see my disclosures right here.
One of many issues I used to be most trying ahead to with our new deck was a pleasant, giant desk for household meals. I supplied to construct one, and Abby’s good friend Jen Woodhouse pointed her to those Ana White plans for the model of desk she wished.
I adjusted the plans barely to suit our house. We made our desk 7’ lengthy.
It truly is superb how a lot cash it can save you by constructing a desk like this. At Restoration {Hardware} this desk prices greater than $2,000, however I used to be capable of construct ours for about $250 in lumber.
After I went to the lumber yard, they’d simply bought out of pine 4x4s, so I ended shopping for cedar 4x4s for the desk base. Cedar is a little more costly than pine, but it surely’s truly higher suited to outside use.
The desk and bench tops have been made out of pine 2x10s and 2x8s. These weren’t particular boards, simply commonplace framing lumber. I did spend a while trying by means of the pile for the straightest boards I may discover.
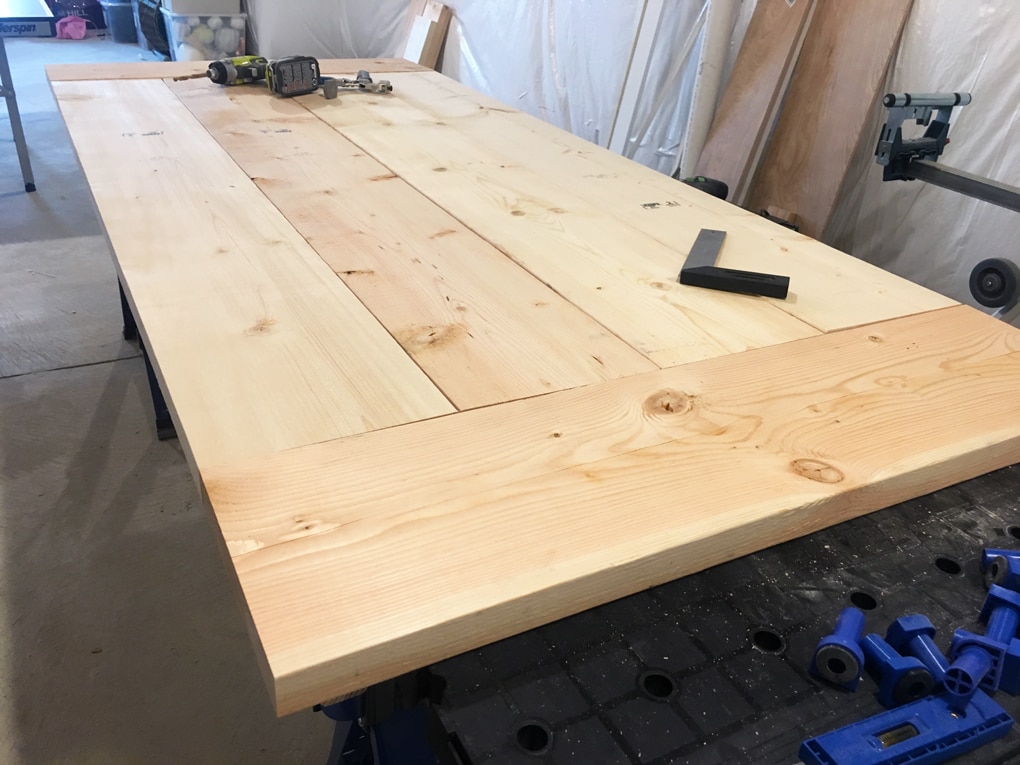
1. Screw the desk prime and the highest bench boards collectively.
I joined the desk prime and bench prime boards with pocket holes and screws utilizing my Kreg Jig.


Ordinarily I might glue the joints as nicely, however I didn’t do this on the desk and bench tops. The boards out there on the lumberyard have been fairly contemporary, so I do know there’s going to be some contraction in the course of the first 12 months.
I need the power to take the desk prime aside subsequent 12 months and re-join if there’s quite a lot of cracking or motion. Even with out glue, the desk prime and bench tops really feel extremely sturdy.

2. Sand the desk and bench tops.
When sanding the tops, I labored my approach down from a really coarse sandpaper to a really tremendous sandpaper. This desk might be for outside use, so I didn’t end it to the extent I might if it was for a eating room or indoor use.

The end I used on the complete challenge is Normal End’s Out of doors Oil, which was additionally a advice from Jen. It’s somewhat expensive at $60/gallon, but it surely’s going to final a very long time for lots of various initiatives.

Initially, I thought of staining and polyurethaning the desk, however Abby has two outside chairs that have been oiled, and I really like how they’re holding up.
The Out of doors Oil actually soaks into the wooden, enhances the grain, and darkens the wooden ever so barely. It was easy to use with a foam brush. Relying on how nicely the oil holds up exterior, I could add one other coat subsequent summer season.
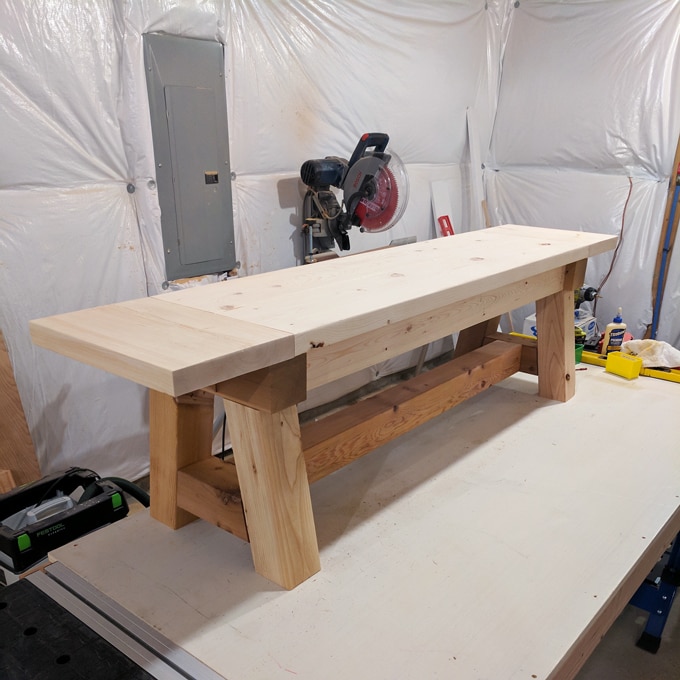
3. Measure the lumber for the bases and lower.
I adopted Ana’s plans for the desk and bench bases. I first measured and lower all of the items with my miter noticed. This desk has a a lot of ten diploma cuts which provides the bottom a novel look.

4. Sand the bases.
In spite of everything the bottom items have been lower, I sanded every part the identical approach I did the desk and bench tops.
5. Screw collectively the bench helps.
At first I wasn’t certain how how I wished to affix the entire assist items. As a substitute of taking the time to drill pocket holes, I simply used lengthy GRK trim head screws at an angle and plenty of glue on every joint. This technique made the assist meeting very fast.

As soon as the trim head screws sink down into the wooden, there’s solely a really small gap. I used three screws on every joint.

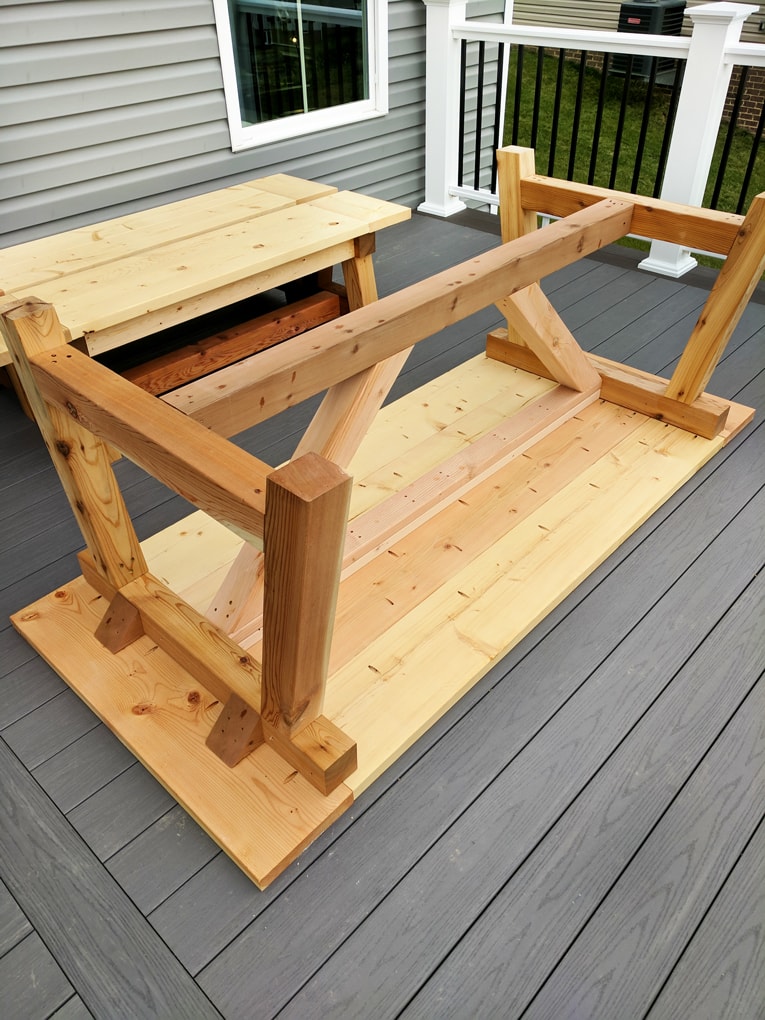
The desk and benches have been in-built my little basement workshop. I used to be capable of full the benches and connect the tops within the basement after which carry them as much as the deck, however I knew I would want to connect the desk prime to the helps exterior on the deck for the reason that full desk would’ve been too large to hold up the steps.
6. Connect the legs and helps.
Abby helped me carry the desk prime as much as the deck the place I connected the legs, then measured and lower the ultimate assist bar and angled items.

In the course of the desk and bench construct, I did discover that the bread-board ends have been a bit wobbly, and that made me nervous. I solved this downside by chopping wedge helps out of my cedar 4x4s and attaching them to the perceive of the bread-board. This further assist actually made a distinction.
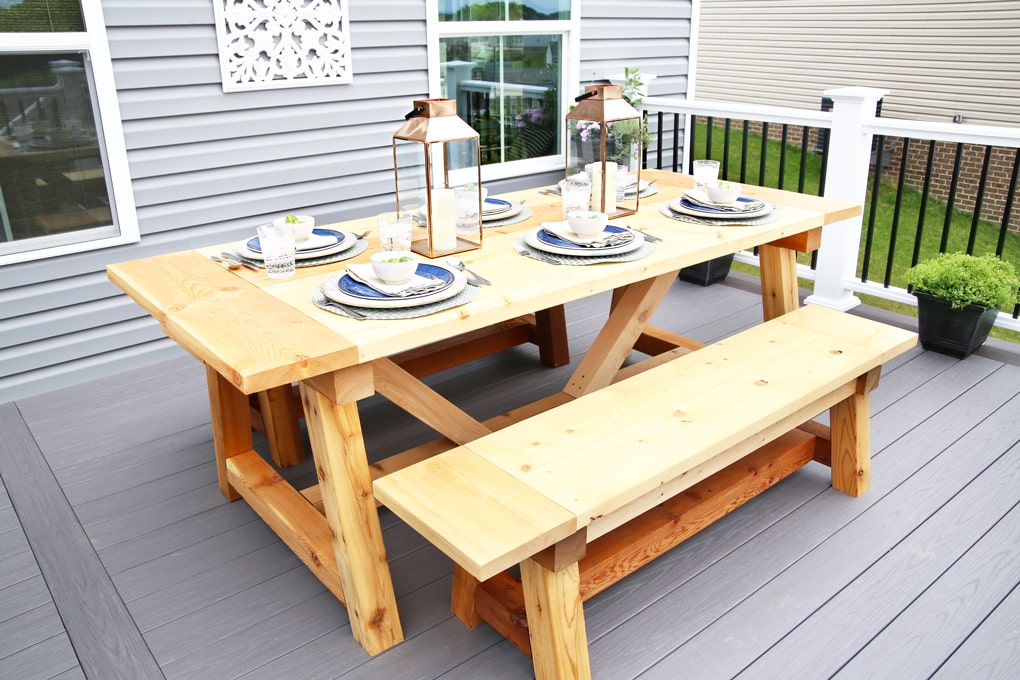
With all of my items securely mounted into place, the desk and benches have been full and able to get pleasure from!

We expect the colour of the wooden to fade and grey somewhat bit over time for the reason that desk might be uncovered to the weather, however I believe that may give it much more character.
Although it was somewhat time consuming, this was a extremely enjoyable construct to do, and I undoubtedly wouldn’t be against extra initiatives like this one sooner or later. (Don’t inform Abby I stated that… ? )

Isn’t he superb?! I really like how the desk turned out. And don’t you are worried, Donnie– I’ve loads extra challenge concepts the place that got here from! ? I had enjoyable dressing up the desk somewhat bit for the deck reveal submit final week, so I believed I’d share just a few of these photos once more!

I really like that we will match a crowd round this desk! We have now two chairs in the lounge that we may deliver out and stick at every finish to suit as many as 8. I see many get togethers occurring out right here sooner or later!

Thanks a lot for following together with our deck progress!
Replace: Our yard deck is lastly completed, try the total reveal!
DIY Out of doors Desk: Incessantly Requested Questions
Have a beautiful week, associates!
This submit comprises affiliate hyperlinks. For extra info, see my disclosures right here.
