
Discover ways to set up craftsman type inside window trim to present your home windows a gorgeous customized, completed look!

These days we’ve been doing plenty of work in our essential dwelling house, which incorporates our kitchen, solar room, and front room. We spend a ton of time on this house, so we knew it will be one of many first areas that we might sort out within the new home.
After we completed and trimmed out our leisure unit, there was one space particularly that was wanting slightly naked…

The home windows! The entire home windows in our home simply got here with a easy sill– no surrounding trim in any respect. We knew that including trim might make a big effect within the house, so I despatched Donnie on a mission to search out the proper items so as to add craftsman type inside window trim work to “beef up” the house a bit.
And oh boy did he succeed! Since he was the mastermind behind this entire venture, I’ll let him take it from right here…
Step by Step Craftsman Fashion Inside Window Trim Set up
An enormous because of WindsorONE for offering product for this submit! Our favorable opinion of lovely, prime quality trim items is 100% our personal. For extra data, see our disclosures right here.
Once we moved into our new residence, I knew that I needed to improve our inside window and door trim. We paid slightly additional to improve the baseboards, however the remainder of the inside trim may be very fundamental and doesn’t match craftsman type exterior.
Just a few years in the past my mother and father constructed a home, and my dad did all the inside trim work himself. He selected very substantial craftsman type moldings, they usually make such a giant distinction in the home.
The trim work is without doubt one of the first issues company discover once they stroll into their home. You simply don’t see that sort of trim anymore. I’m certain it additionally provides substantial worth to their residence.
I took plenty of footage of my mother and father’ trim work and in addition searched on Google and Pinterest for a couple of days till I discovered the WindsorONE Classical Craftsman line of moldings. This was the precise look I used to be going for!
1. Select the Proper Moldings for Your Craftsman Fashion Window Trim
WindsorONE is a molding producer, and yow will discover their trim work at lumber yards all around the nation. What actually stood out to me on their web site was their type guides (classical colonial, Greek revival, colonial revival, and classical craftsman).
WindsorONE created these numerous traces of inside moldings to work collectively as one cohesive type. To me, their craftsman type moldings have a significantly better look and magnificence than the rest I’ve discovered.
I used their seller locator software and located a number of close by locations that inventory WindsorONE moldings. I ended up getting all my trim from Allegheny Millwork & Lumber right here in Pittsburgh.
The variety of trim profiles a spot like Allegheny Millwork has in comparison with a giant field retailer is simply wonderful.

They had been variety sufficient to chop all of the trim items all the way down to my most popular measurement and even helped load up the truck.
The trim is all finger-jointed pine, so it’s a lot straighter than another pine trim however doesn’t have the floppy really feel of MDF trim with smooth edges. The entire particulars on the trim are very sharp and every thing comes primed. It’s very prime quality stuff.

That is the craftsman type look I used to be going for…

2. Collect the Right Molding Items to Use for Craftsman Fashion Window Trim
Particularly for the window trim, I used the next WindsorONE items…
- 1×5 flat inventory (Due to the scale of my window, I wasn’t ready to make use of their window stool piece.)
- Apron
- Cove
- Casing
- Cease mildew
- Header cap

I discovered all the proper SKUs for the items I wanted on this web page. This made it simpler when contacting the lumber yard.

I used the 1×5 because the window stool. (I used to name it a sill.) Beneath the stool, I used their apron piece which has a slight bevel on one of many edges. Connecting the stool and apron is slightly cove trim piece that simply advertisements a little bit of element.
On the edges of the window I used the WindsorONE casing piece. These are good as a result of two of the perimeters have a slight bevel and the scale are slightly smaller than an ordinary 1×5. Alongside the highest I used the cease mildew piece, a 1×5 as the primary header piece, after which the header cap.
3. Prep the Window for New Inside Trim
Earlier than I began this venture, our present home windows had no aspect casing or header, only a easy stool and apron.

I scored the caulk line with a utility knife after which used a rubber mallet and crow bar to knock out the prevailing trim so I clear slate to work with.

Then I made a “reveal” mark all the best way across the window. As a substitute of butting up the brand new trim items proper to the sting of the drywall, I made a decision to make use of a 3/16″ reveal. The reveal provides a little bit of element and simply appears to be like higher.
To make the reveal I set my Kreg Multi Mark to three/16″ after which made little hash marks all the best way across the window opening. This little software turns out to be useful for therefore many woodworking initiatives! It’s method simpler and extra correct than utilizing a tape measure or ruler.

4. Create a 60″ Opening
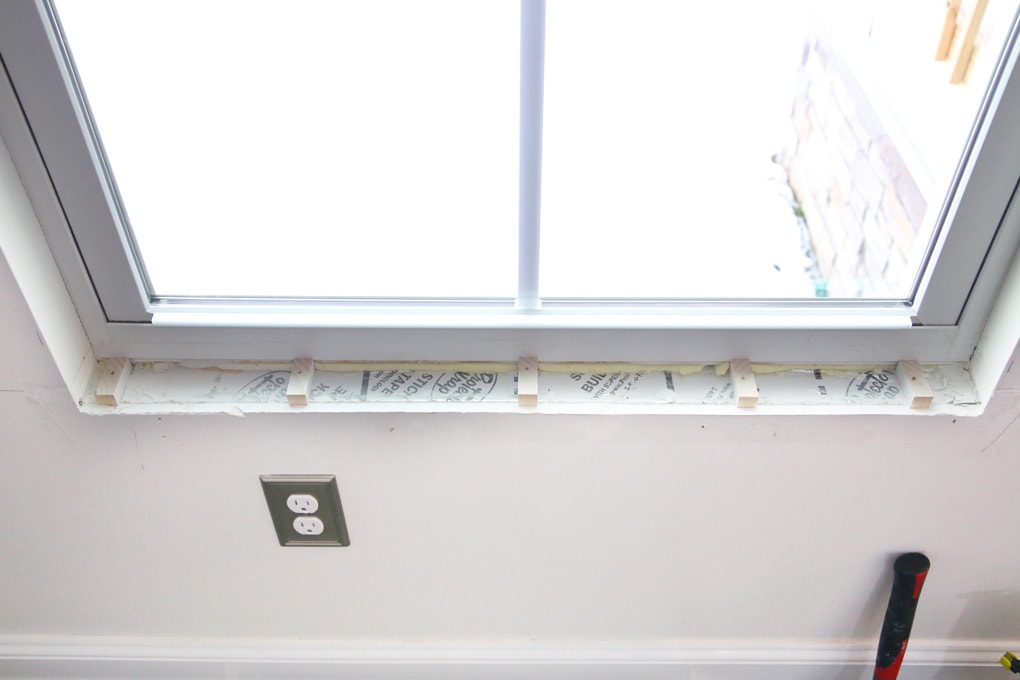
I needed to protect a 60″ opening on the within of my home windows as a result of it looks as if plenty of window remedies like shades and wooden shutters use 60″ as an ordinary.
If I positioned my 1×5 window stool immediately on the window framing you possibly can see within the image, I’d have ended up with a bigger than 60″ vertical window opening. To beat this downside, I created some customized measured shim items and screwed and glued them to the window framing.
This is able to elevate the stool to the proper peak. Due to the shim assist and the eventual window apron assist beneath, every thing can be rock strong.
5. Set up the New Window Stool
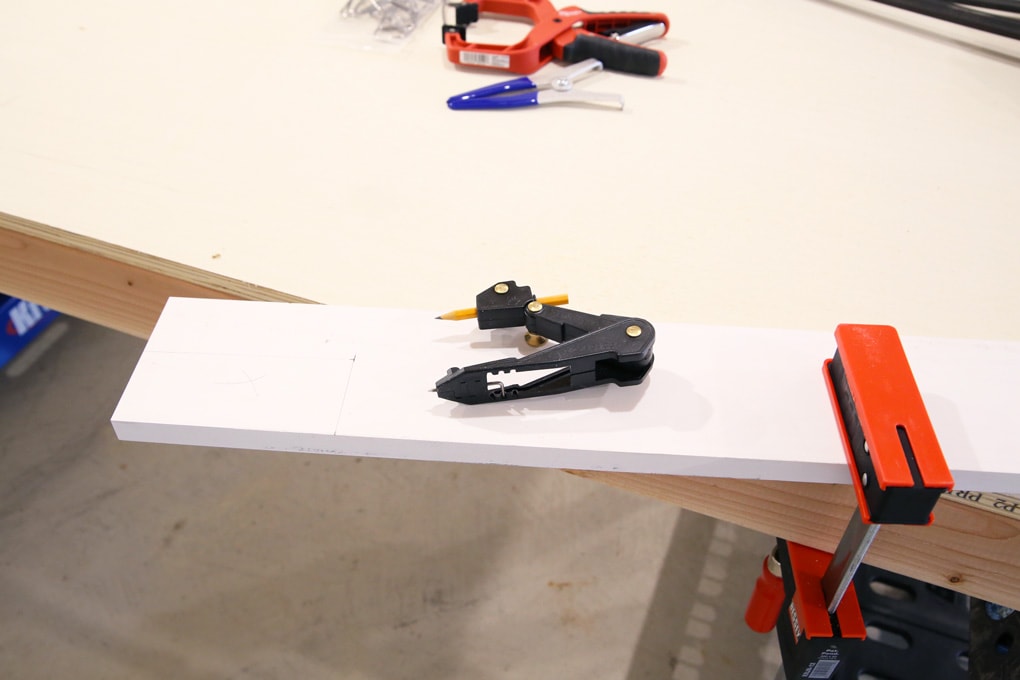
Subsequent I minimize the window stool to roughly the proper size with my miter noticed. I then held it and marked it in place. It’s all the time simpler for me to mark the precise board moderately than measuring with a tape after which transferring that measurement to the trim piece.
When marking the stool, I needed to take into consideration the width of the aspect casing (I marked that on the wall) in addition to the three/4″ overhang previous the casing on each far ends. I additionally marked the cutout line so the piece would slid properly again into the window opening with “wings” extending on each ends.
As a way to have a greater match, as an alternative of simply drawing a straight line on the board, I used the protractor beneath to scribe a line that matched the wall contour. All I needed to do was observe the wall line with the purpose of the protractor and that might switch that very same line contour onto the board.
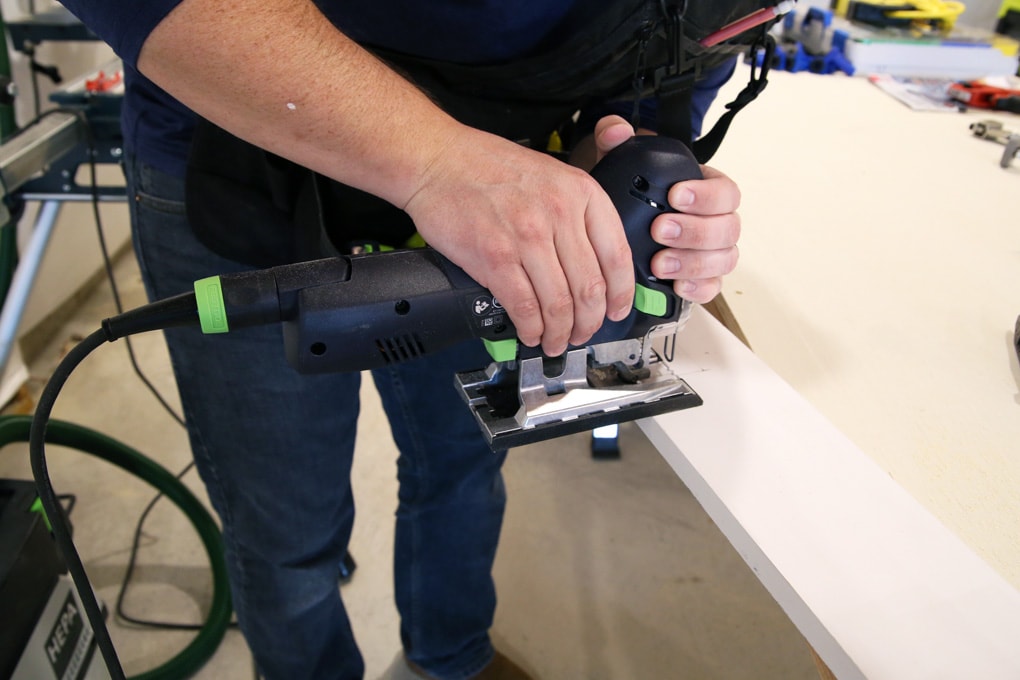
As soon as my window stool was marked with all the cuts, I used a jigsaw to chop every thing out. I like to recommend testing your jigsaw on a scrap piece of trim first to be sure to don’t get an excessive amount of splintering. Some are higher than others.
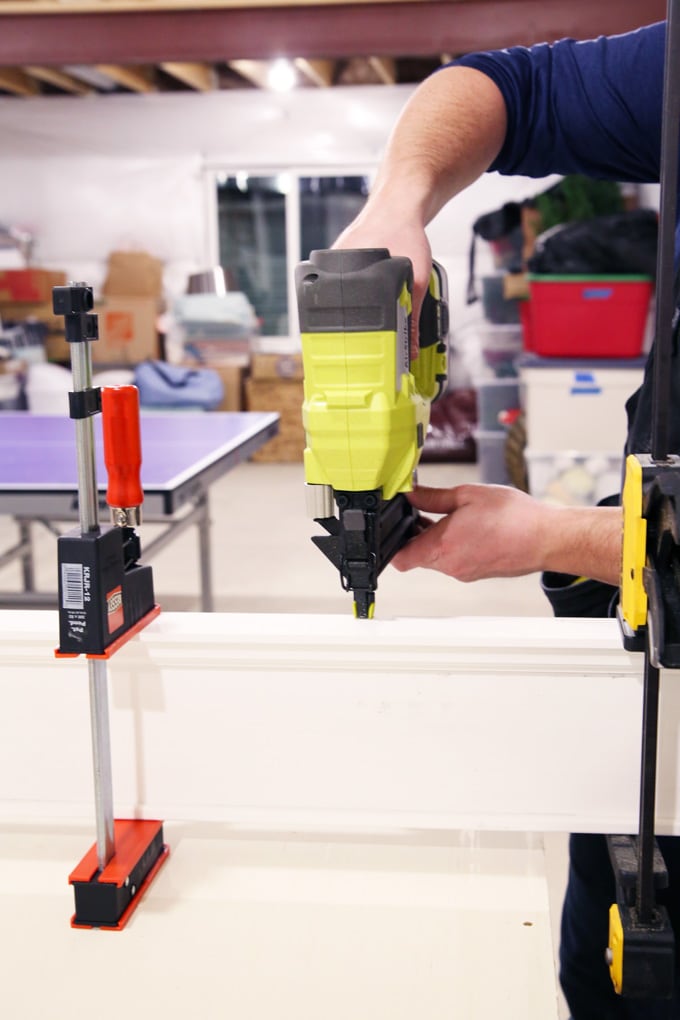
As soon as the stool was minimize, I put in it with my nailer in addition to some lengthy GRK trim head screws. These screws are incredible. I pre-drill all of the holes, however I don’t countersink something. The small trim heads countersink on their very own and it’s a really small gap that I’ve to fill later.
Right here’s the way it sorted the stool set up. You’ll be able to see that I nonetheless want vertical casing items to take a seat immediately on the stool in addition to an apron and cove piece beneath the stool.

6. Set up the Window Apron and Aspect Casing
Putting in the window apron and aspect casing was fairly easy. I held every bit in place, marked, minimize, nailed, after which screwed. I’d additionally glue anyplace wooden met wooden.
My reveal traces had been already marked on the wall, so I knew precisely the place every board ought to be positioned.
Happily, I had taken a video of our total home pre-drywall so I knew precisely the place my studs had been. If there was any doubt, I marked studs with my magnetic stud finder.
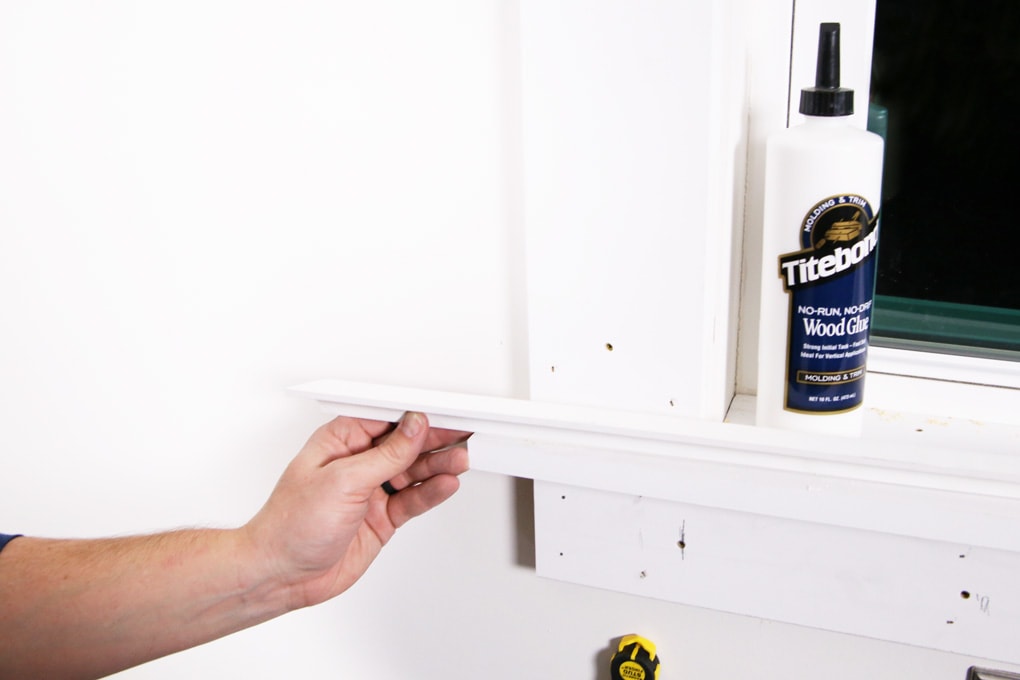
Subsequent I put in the little cove piece that sits below the stool. Glue is absolutely necessary for small trim items like this. This was the primary venture the place I used TiteBond’s trim glue, and I actually preferred it. It’s designed to be much less runny so there’s much less wiping up glue from throughout your trim work.

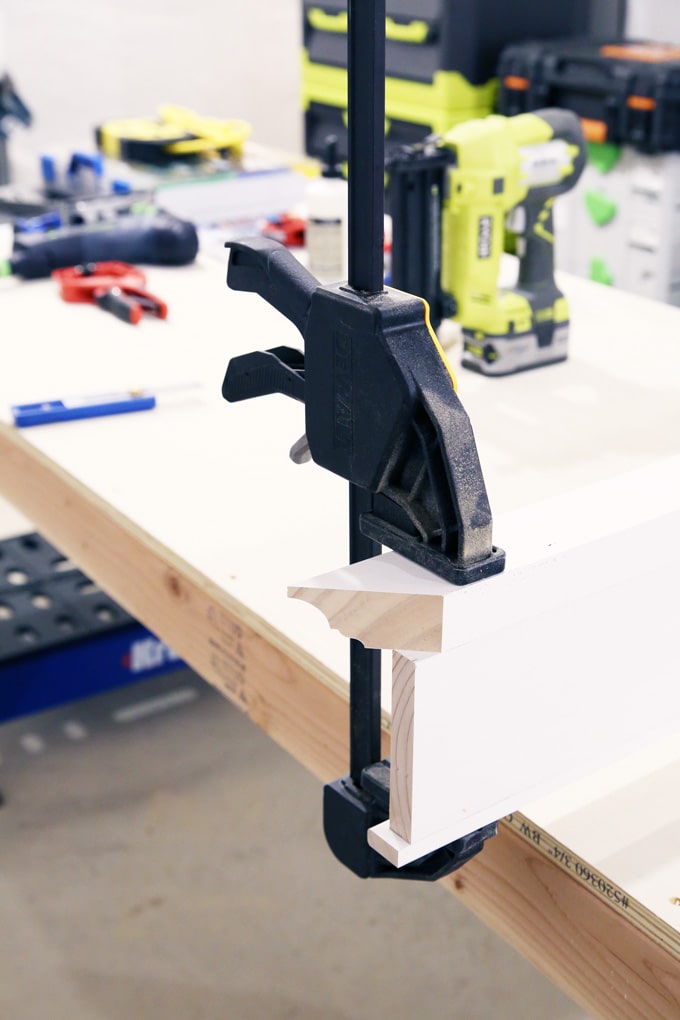
I additionally minimize little “return” items to wrap across the apron. This was straightforward with my miter noticed. After I rigorously glued and nailed these items, I additionally used these superior little miter clamps to carry every thing in place.

The miter clamps even have these cool little pliers to unfold them out.

7. Assemble and Set up the Window Header
I then assembled the header as a totally separate unit. It consisted of three trim items: a cease mildew, 1×5 flat inventory, after which a header cap. All of the items might be discovered right here on the WindsorONE website.
It was a lot simpler to minimize and assemble the header on a desk within the basement moderately than up on a ladder. It was only a matter of measuring, glueing, nailing, after which clamping in a single day.
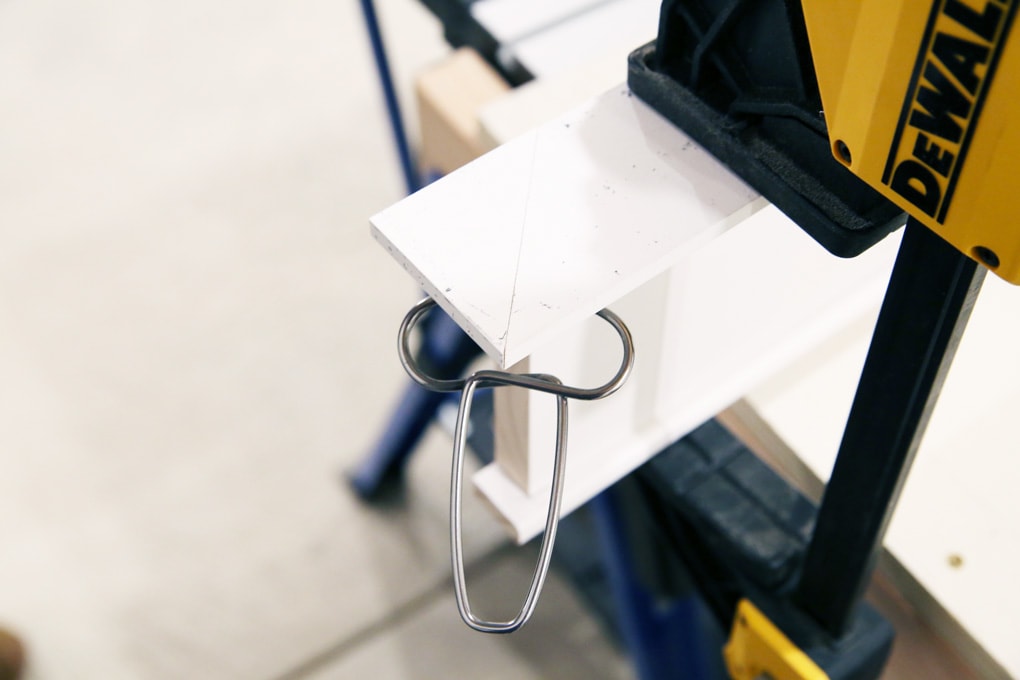
Like the image beneath, it’s a must to account for the header return piece so it appears to be like prefer it flows again into the wall. You’ll be able to see the hole the place I’d set up a small mitered header cap piece ensuring the overhang was similar on the entrance and aspect of the 1×5.
Once more, my miter clamps got here in useful for conserving this small “return” piece in place.
The following day, I unclamped my header meeting and set it on prime of the aspect casing. I then glued and nailed the piece to the wall. Right here’s how every thing sorted the set up, nail holes and all. What a giant distinction!
8. Prep and Paint the Craftsman Fashion Inside Window Trim
Prepping for the ultimate coat of paint was considerably depressing in comparison with the enjoyable of putting in all of the trim items. Right here’s what I used…
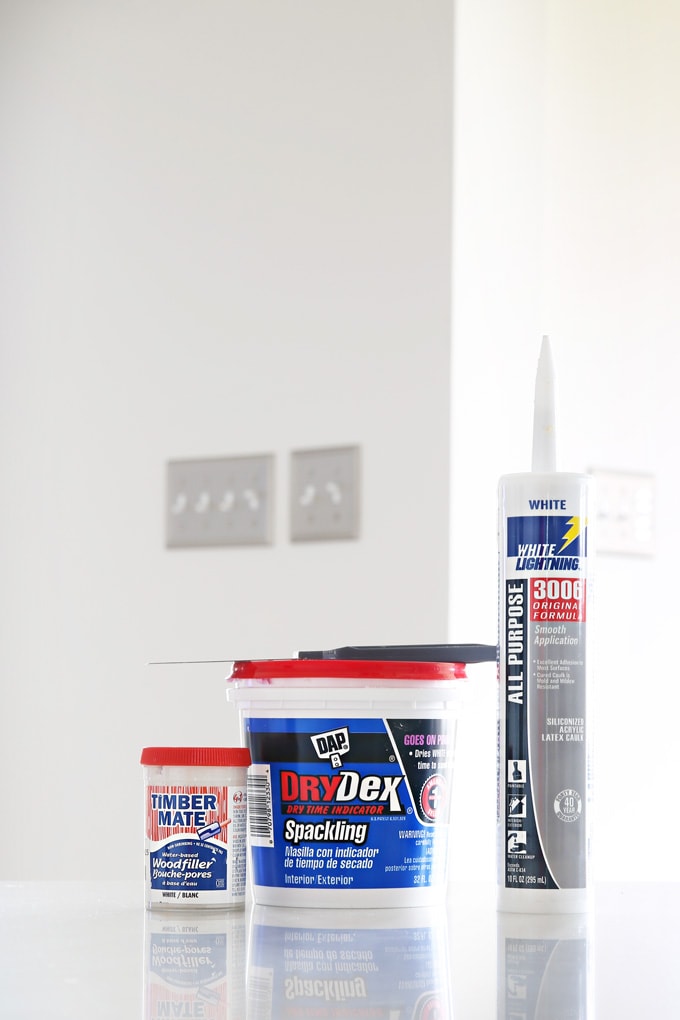
- DAP spackling for the actually vast gaps. Happily I didn’t have to make use of a lot of this; it’s a multi-step course of with spackling as a result of it shrinks considerably as soon as dry.
- Timber Mate white wooden filler. I exploit this to fill nail and screw holes. It doesn’t shrink as soon as drying, which is sweet, or else I’d find yourself with little recessed nail gap areas.
- White Lightning caulking. I actually like these items. It’s straightforward to wash up with water, is paintable, and doesn’t appear to draw dust as soon as it’s dry.
After utilizing the spackling to fill giant gaps and the wooden filler for the nail holes, I calmly sanded every thing. Then I primed every thing. (I do know the trim items come pre-primed, however there have been sufficient nail holes and uncovered wooden edges the place I had made cuts that I assumed I ought to prime every thing.)
After priming, I used caulking to fill all of the remaining hairline gaps and each place the trim met the wall. This made a giant visible distinction on the trim.
For the ultimate coat of paint, I used the water-based model of Benjamin Moore Satin Impervo. I used to be actually impressed with this paint. It was straightforward to brush on and had nice protection.
The satin sheen can be good. There’s sufficient gloss to have the ability to wipe the trim clear, however not a lot that it causes a glare and exhibits each tiny imperfection.
Putting in Extra Craftsman Fashion Trim Shifting Ahead
After finishing a couple of home windows, I used to be actually stunned at how doable this venture was. The trim set up went method quicker than anticipated. I truthfully spent much more time prepping the home windows for portray and doing the precise portray than I did putting in the trim.
Now that I’ve discovered a supply of high-quality and genuine craftsman type trim the place every thing within the assortment matches, I’m tremendous excited so as to add extra window trim, door trim, crown molding, and different craftsman type trim components to our home. The WindsorONE moldings have been good for us.
If you wish to add plenty of element to your house with trim work and moldings you need to use the seller locator and discover a lumber yard that carries WindsorONE. You may as well name the extremely useful WindsorONE staff at 888-229-7900 they usually’ll help you to find the trim items you want on your venture.
Able to see the way it turned out? (Spoiler alert: I’m in LOVE!!)
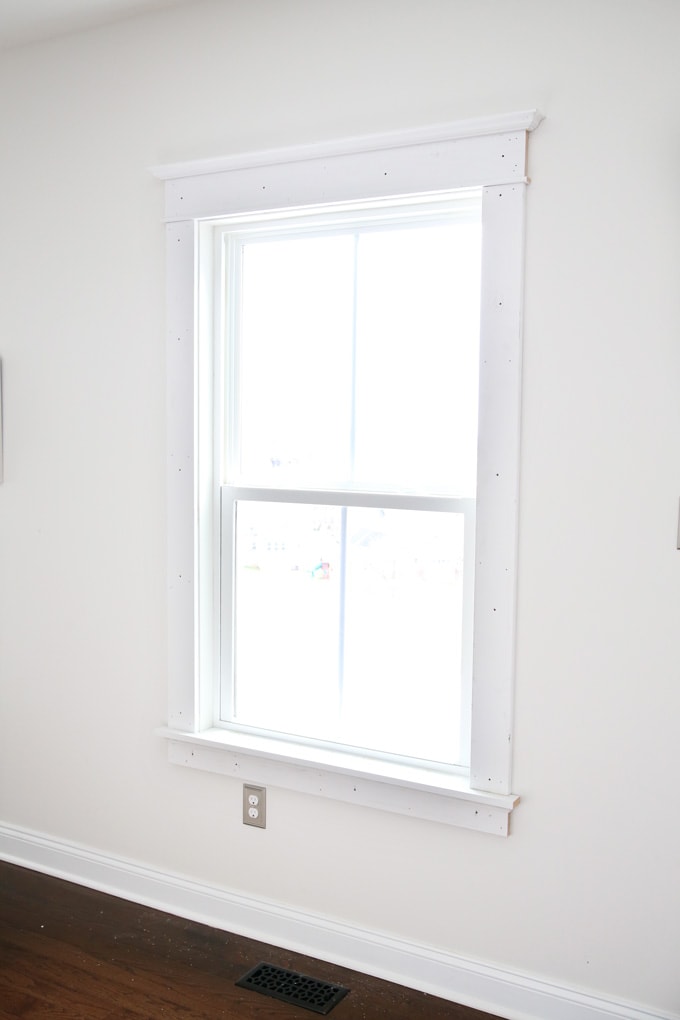
Here’s what the window trim seemed like proper after we put in it…

It undoubtedly makes the house really feel a lot extra completed and full! It additionally provides plenty of character, which I’ll all the time take extra of! ?

We then ended up including a board and batten therapy to the lounge as properly, giving the house an much more customized look.

We added craftsman type inside window trim in our sunroom too…

Need to see a earlier than and after?

Coronary heart eyes!! I’m so thrilled with how this venture turned out, and I can’t wait to proceed so as to add stunning trim and moldings in the remainder of our residence as properly!
Have you ever performed any woodworking initiatives in your own home just lately? I’d love to listen to about them within the feedback!
Have an exquisite day!
An enormous because of WindsorONE for offering product for this submit! Our favorable opinion of lovely, prime quality trim items is 100% our personal. For extra data, see our disclosures right here.
