
Pals! Thanks all a lot in your candy phrases about our kitchen reveal final week! I used to be so excited to share our area with you that I went forward and did the reveal first after which needed to return again and contact on a few of the DIY initiatives we did alongside the way in which. Probably the most noticeable adjustments was the upgraded trim on the kitchen island.
After we moved in, the island trim was minimal and fairly flimsy trying:


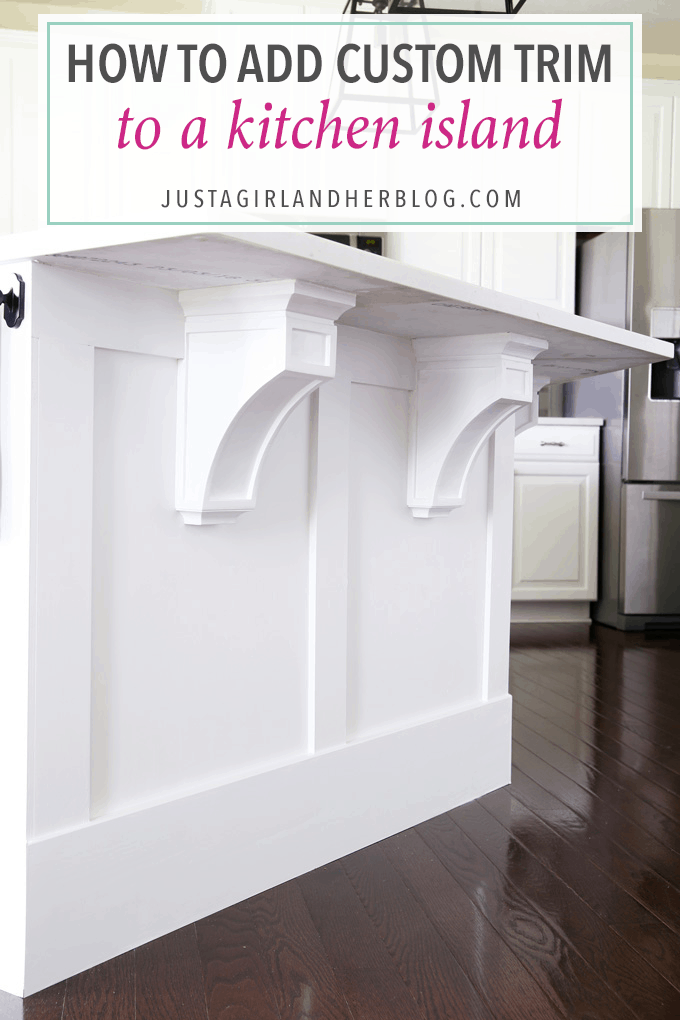
The corbels appeared a bit of dated to me, and because the island is giant and a focus within the kitchen, I knew I needed to beef up the trim work as properly to make it extra substantial. Happily, Donnie is superior at putting in trim, so we made a plan and he set to work!
Learn how to Add Customized Trim to a Kitchen Island
Provides
An enormous due to Osborne Wooden Merchandise for offering the corbels for this venture. This put up comprises affiliate hyperlinks. For extra info, see my disclosures right here.
Listed here are the instruments and provides we used for our island venture:
Course of
The very first thing we did was take away all the earlier oh-so-flimsy trim from the island, giving us a clean slate to work with.

We then started putting in the brand new trim. We used 7 1/4″ tall craftsman fashion baseboards from WindsorONE at the bottom of the island. As a result of the island has a non-right-angle within the center, Donnie had to make use of a carpenters protractor to search out the proper angle. Then he divided that quantity by two when organising the miter noticed for the minimize. The mitered nook got here collectively properly.


We had initially deliberate to make use of 1×4 flat inventory for the vertical trim items, however realized that they might then be even withe the sting of the counter on the ends of the island, eliminating any overhang. We didn’t love how that appeared so as an alternative, Donnie ended up ripping down items of 1/2″ plywood into 3.5″ huge strips, giving us the vertical items we would have liked and likewise including some additional dimension.

Earlier than we added the trim items proper beneath the countertop, we needed to set up the corbels. We determined to go with the Verona Mission Corbels from Osborne Wooden Merchandise, which have been a lot extra substantial than the previous corbels and gave us the precise look we have been going for!

We painted them white and allow them to dry utterly, and so they have been prepared to put in. We debated about placement for some time, however due to the distinctive form of our island, we determined it will be finest to easily set up the brand new corbels the place the earlier corbels had been.
To put in the corbels, we would have liked to anchor them from behind (inside the cupboard) utilizing cupboard screws with a large, flat head. It was a bit of tough getting all the things lined up however utilizing a stage and ruler, we have been in a position to mark three drill holes on the skin of the island for every corbel (1). Donnie then pre-drilled via the island from the skin (2). I held up the corbels within the actual proper spot (3) whereas Donnie climbed into the island and first pre-drilled into the corbels (4) after which anchored them utilizing cupboard screws. The screws pulled all the things in good and tight.

As soon as the corbels have been in place, we might add the ultimate trim items, which Donnie additionally minimize out of plywood to match the corbel profile. He used a protractor to scribe the corbel edge profile onto his plywood strip after which used a jigsaw to make the minimize.


So all the trim was put in, however that was truly solely half the battle! Then it was time for filling all of these little nail holes and seams! This was my contribution to the island venture. ? I spent a number of hours with Downton Abbey enjoying within the background, filling and smoothing each little gap and area.
To ensure our trim was as easy as doable earlier than we painted, Donnie used his orbital sander to stage all the things off. It has a in-built mud assortment system in order that we didn’t make an enormous mess throughout our kitchen or harm our lungs within the course of!

We then primed and painted all the things utilizing Behr Marquee Cameo White in a satin sheen. And I’m LOVING the way it turned out!

Trim work simply provides a lot attraction and character to an area, and in a brand new construct, we’ll take as a lot character as we are able to get!

Need to see a earlier than and after?

I adore it!! I will probably be again subsequent week to share extra of our kitchen DIYs!
Have you ever tackled any kitchen initiatives not too long ago? I’d love to listen to about them within the feedback!
Thanks a lot for following alongside! Have an exquisite day!
An enormous due to Osborne Wooden Merchandise for offering the corbels for this venture. This put up comprises affiliate hyperlinks. For extra info, see my disclosures right here.
