
Create an organized junk drawer to have quick access to all of these small gadgets you employ on a each day foundation like workplace provides, batteries, and fundamental instruments!

Okay, I understand that the phrase “organized junk drawer” kind of feels like an oxymoron, however I actually am enthusiastic about this new little spot in our home!
You see, within the townhouse we had this little desk/sideboard within the kitchen the place we saved some necessities like writing utensils, essential college data, a measuring tape, additional batteries, and so on…

I hadn’t taken the time to determine the best way to arrange something like that in our new home, although, so all of final college 12 months, we have been always operating all around the home to seize the gadgets we would have liked! Eek.
I not too long ago rearranged issues in our kitchen and I knew that a part of that re-organization course of wanted to incorporate making room for our incessantly used gadgets. Thankfully, I ended up having two additional drawers free, so that they grew to become our a lot wanted “junk drawers”– organized junk drawers, that’s!
Get all the particulars in our fast video!
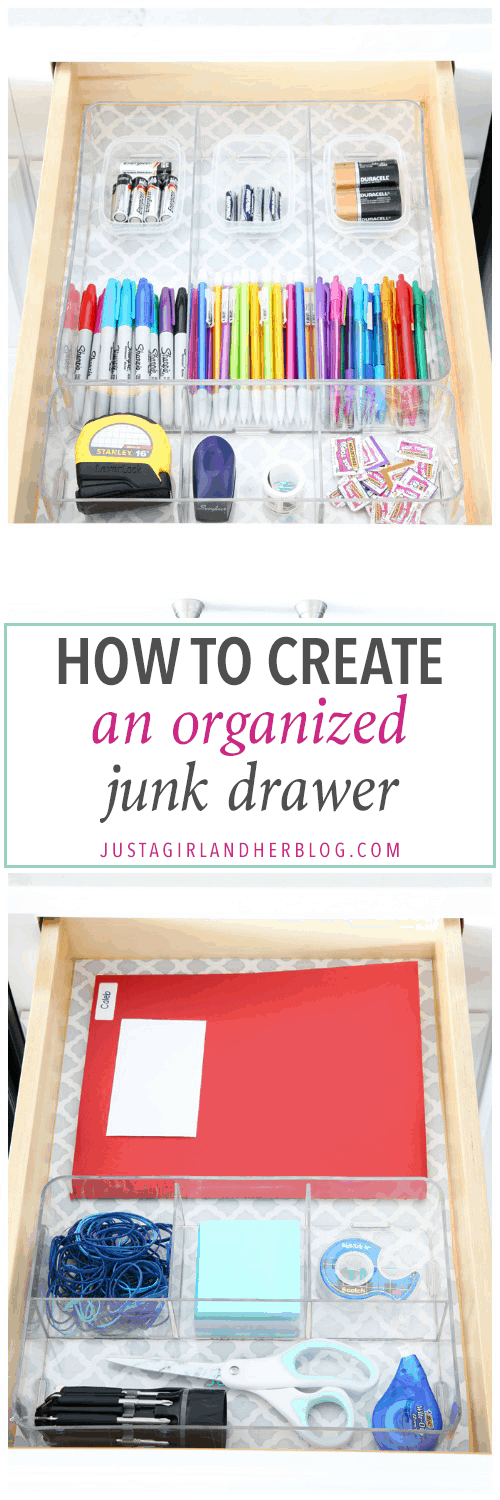
The right way to Create an Organized Junk Drawer
This put up comprises affiliate hyperlinks. For extra data, see my disclosures right here.
Step 1- Make an inventory of all the pieces you wish to retailer in your drawers.
The very first thing I did once I got down to create my junk drawers was to make an inventory of all the pieces I needed to incorporate. I attempted to assume again to all of these instances the place we have been both operating as much as my workplace for provides or all the way down to Donnie’s work station to snag a software or one thing and wrote down each merchandise I may consider.

Step 2- Select applicable drawer organizers.
As soon as I had my checklist and knew what I wanted to slot in my drawers, I measured every of the drawers and got down to discover the proper organizers that will corral all of my gadgets and match my area nicely.
I ended up selecting clear organizers that I discovered at Goal, however there are SO some ways to create drawer dividers! You could possibly snip the bottoms off of packing containers of cereal or rice or no matter smaller packing containers you’ve in your home to create dividers. (Cowl them with wrapping paper to make them fairly!) The greenback retailer usually has drawer dividers in lots of sizes and styles as nicely.
Step 3- Add a reasonably drawer liner.
This step is optionally available, however I really like so as to add a reasonably pop of sample to the underside of my drawers! I discovered my drawer liner right here.

Step 4- Determine on merchandise placement and label!
I sometimes mess around with the configuration of my gadgets for a bit earlier than I discover the suitable mixture. As soon as I’ve determined the place all the pieces will go, I like so as to add labels. They give the impression of being cute AND everybody all the time is aware of the place to place all the pieces again!

I like to make use of my Silhouette machine and reduce labels out of adhesive vinyl. In the event you don’t have a Silhouette, I additionally love this label maker that’s pretty cheap, or you can also make your individual labels! I’ve a tutorial for making them in Phrase right here and on a free web site known as Canva right here.
Step 5- Refill your drawers.
As soon as all the pieces is labeled, it’s time to replenish my drawers!

Everybody can have totally different wants, so what you resolve to incorporate could also be fully totally different than what I used. In the event you’re on the lookout for some concepts, here’s what we determined to place in our drawers:

- A folder with our boys’ essential college data that we might want to entry throughout the 12 months
- Rubber bands
- Publish-it notes
- Tape
- A multi-tool/ flashlight (I acquired mine at a running a blog convention and it simply occurred to be the proper dimension for our drawer! This one is analogous.)
- Scissors
- White out
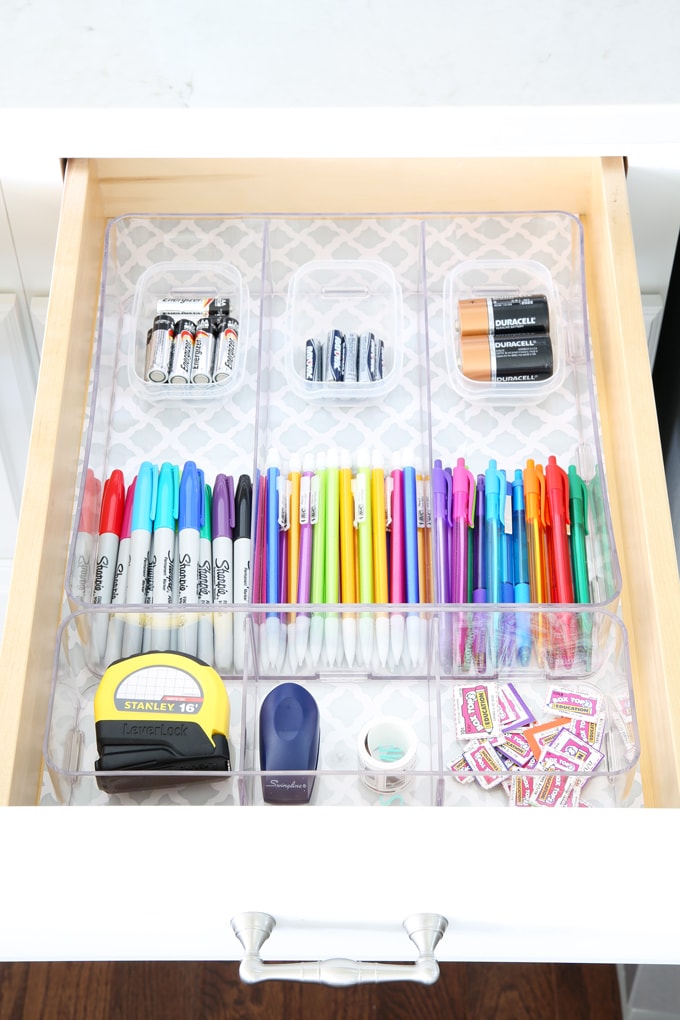
- Batteries in the most typical sizes we use in our downstairs dwelling space
- Sharpies (for labeling all the boys’ college gadgets)
- Pencils
- Pens
- Measuring tape
- Stapler
- Stamps
- Field tops (I actually wanted a delegated place to retailer these as we gathered them to donate to our faculty!)
In order that’s it! I really like this mission as a result of it’s so easy and anybody can do it, however it is usually actually practical and a useful space to have as nicely. And because it’s uncluttered and never over-stuffed, we’ll all the time be capable of discover what we want after we want it. Love!
In the event you’re on the lookout for extra kitchen group inspiration, it’s also possible to get extra particulars about our present kitchen group in these posts:
Our Organized Kitchen Tour
5 Ideas for Making a Superbly Organized Pantry
The right way to Arrange Beneath the Kitchen Sink
The right way to Arrange the Fridge
The right way to Arrange Youngsters’ Dishes
The right way to Arrange Meals Storage Containers
The right way to Create an Organized Junk Drawer
Working with a smaller kitchen area? These posts in regards to the small-but-organized kitchen in our townhouse could also be useful:
The right way to Arrange a Small Kitchen
The right way to Arrange a Small Fridge
The right way to Arrange a Kitchen Pantry
[Psssttt… Get 100 brilliant ideas for organizing every room of the house here!]
What sorts of issues do you assume are useful to maintain in a “junk drawer” or central space of your home? I’d love to listen to your concepts within the feedback!
Have a beautiful week, buddies!
This put up comprises affiliate hyperlinks. For extra data, see my disclosures right here.
